Over the last few weeks, I've learned A LOT that has made online teaching easier for me and made accessing the technology easier for students & their families.
Clickable PDFs are something that have saved me SO much time and they've made navigating technology simpler for my students.
Why I love clickable PDFs:
- They're super easy to make and for students/ families to access!
- You can email a PDF as an attachment to give students access to a variety of links/ materials in one spot!
- You can also upload clickable PDFs to Google Drive™, Google Classroom™, etc.
- They're a great way to organize many resources/ materials in one centralized spot.
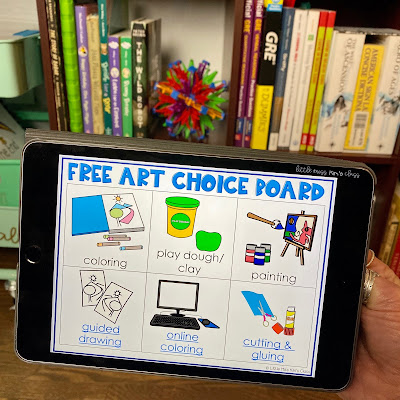
- A few ideas for using clickable PDFs include: making clickable choice boards, clickable schedules, etc.
Here's a simple tutorial for making clickable PDFs:
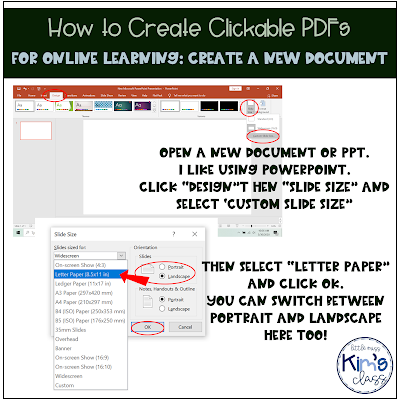
1) Create/ open a new document. You can make these in a Word Doc, Powerpoint, etc. I prefer Powerpoint because the formatting in PPT is easiest for me. Format the page to the size of a piece of paper by: clicking "design" then " slide size" and then select "custom slide size." Then select "letter paper" in the drop down. You can also switch to portrait or landscape mode here. Then click "ok."
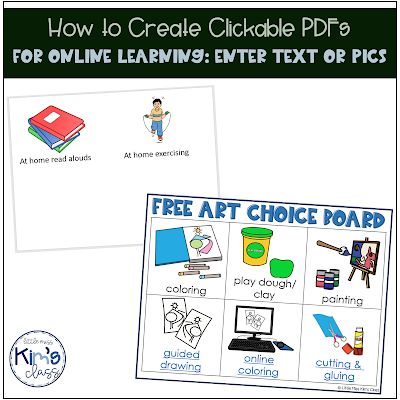
2) Add text and or pictures. I'm not explaining how to add text/ images to a PPT (if you need help with this, just Google™ it! There are a ton of helpful YouTube videos for this). You can make your slide as fancy or simple as you want! I like to organize my text & images in squares or a charts.
3) Add the links. Go to the website you want linked. Copy the link (you can highlight the link, right click and select "copy" or you can highlight the text and click "CTRL" and "C"). Now go back to your Word or PPT document. Highlight the text or image you want linked, right click and select "hyperlink."
4) Paste the link. Paste the link in the address box. You can right click and select "paste" or you can click "CTRL" and "V". Then select "ok". The text will turn blue to indicate that it was linked! Well done!
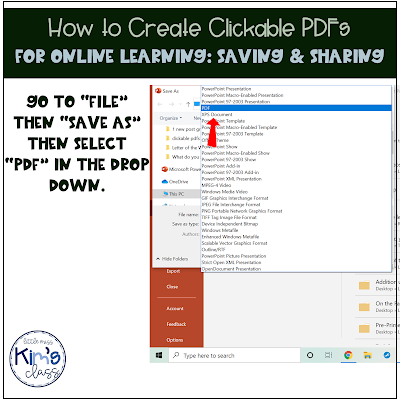
5) Save the document as a PDF. Go to "file" then "save as" and then select "PDF" in the drop down. Save the PDF to your computer.
6) Sharing the PDF. The PDF will look like this! When the blue text/ links are clicked on computers or tablets, it will go right to that link. You can email the PDF to students or post them on any of your online classroom platforms.

